Showing posts with label TIE Defender. Show all posts

Sunday, 20 November 2016

Sparkle Motion Squadron / chapter 1 / The Sparkle Awakens

OK, so first off, here is my apology for being rubbish at updating my blog recently… sorry!

And here is what I’ve been up to since failing to update my blog.


Ibuywargames / Woking / 16-10-16

I’d been running Raulob Roolink (Fenn Rau / Palob / Manaroo all with Mindlink) for absolutely ages at this point, basically since the dial for the Fang had been spoiled after Gencon. I’d had A LOT of practice with this list, on Vassal and on tabletop (subbing the Fang dial for the almost identical TIE/FO dial) so I definitely should have taken this list, right? I didn’t.

At the eleventh hour, I decided to take a “jank-tastic” Imperial list consisting of Quickdraw, RAC and Scourge. It was crap and I went 1-3 :( Interestingly enough, the players who were running Mindlink Scum lists all ended up near the top of the rankings.

Lesson learnt – don’t change your list at the last minute. Idiot!

This was taken during my only win of the day


Ting Comic-con / Tring / 22-10-16

So, I wasn’t going to be an idiot this time. Raulob Roolink it was! And I did great! I was 2-0 after the second round (out of four) and I got paired against Joel who was also 2-0.
Joel was also running a Mindlink Scum list but with Old Teroch in place of Palob. Myself and Joel had played out this matchup 6 or 7 times and because of my initiative bid, I had come out as the winner every time. Before we started the match I went to the toilet, whilst in there, I revelled in the fact that after this match I would be 3-0 and in with a pretty good chance at winning the whole thing.

The 186th Squadron have a motto, “our overconfidence is our weakness”. Yep, you guessed it, I lost against Joel! Made a silly mistake because I was so sure of victory.

Anyway, I won my last game, went 3-1 and came 3rd in the rankings, certainly not awful! Joel came one place above me. Awesome!

Lesson learnt – don’t take matchups for granted. Idiot!


Conquest / Shoreham / 29-10-16

Here we go again. Raulob Roolink for the win! Oh, wait, actually, no. I came 13th of 15 players in this one.

Why? Was it the list? Nope, I hadn’t changed a thing since last tournament. (Even though, when I told fellow X-Winger Simran how I was doing he asked, and I quote “Are you running that Quickdraw bullshit again?”) Did I make any silly mistakes? Not really. Was it just not my day? I guess not.

Lesson learnt – sometimes it’s just not your day. Possibly the most important lesson that you can learn in X-Wing!

About 30 seconds before Palob went pop!


Which brings us up to date!


Marquee Models / Harlow / 20-11-16

So three important things have happened in the run up to this tournament.

1) The FAQ. Triple Jumpmaster U-Boats have effectively been nerfed so hard that they are (almost) dead. A few people are still running them and making them work but they are not half as much of a “meta concern” now as they were.

2) Heroes Of The Resistance has dropped. Ever since Rey and Finn were spoiled, she has been seen all over the Vassal community. Especially VI’d up to PS10. Many things die to this! Also HOTR brings us a new, PS9 version of Poe. Now he’s PS9, he can use his EPT for things like PTL or predator. This expansion is pretty big for the meta!

3) SPARKLE MOTION SQUADRON IS BORN! Yep, we got us a squadron! It was only a matter of time as a load of us play together at Dark Sphere on Tuesdays (and the 186th Squadron name was already taken). Four of us were in attendance for this tournament. Myself, Joel North, Lloyd Boman and Full-On Paul (henceforth to be referred to as FO) and (spoilers!) we put on a pretty good show!


What was I flying? I’ll tell you

Marrek Stele – x/7 title / Juke

RAC – VI / Hot Shot Co-pilot / Gunner / Rebel Captive / Engine Upgrade

What’s that all about then?

So ideally, Marrek gets his focus and evade from a 3 speed move and the title. RAC moves last and takes a target lock on something in range 1 or 2 (to proc his ability) which is also in Marrek’s arc.

RAC fires and uses no modification; the best result here is that the first attack is completely evaded. The beauty of this is that no matter what the defence dice are, the defender must use his focus to modify his dice, even if he rolls no eye results and modifies zero defence dice.

For this example, RAC rolls hit, eye, blank. The Defender he is shooting at rolls 2 evades. More than safe BUT he loses his focus because he MUST spend it.

Then gunner kicks in and RAC uses his target lock and (if possible) his ability to gain as many hits as possible, the defender has already spent his focus so is much more vulnerable!

Finally, Marrek shots (ideally, he still has his focus and evade tokens) and jukes away an evade result the defender rolls. Much hurt!

Also, rebel captive pisses everyone off (PTL my ass) and engine upgrade allows me to boost out of people’s arc, continuing to deliver the campaign of “maximum-screw-you” to my opponents.

So how did it work out on the day? Well, I’ll tell you.


Match 1 vs Joel North!


Rey – VI / Finn / Hot Shot Copilot / Homing Missile / S-loop title

Jake – VI / Autothrusters / title / PTL / Prockets

The first engagement


A SPARKLE MOTION FACE OFF!!!

Joel had been speaking to me earlier about whether to run Fangaroo or Jake/Rey. We had discussed it and he had gone with Jake/Rey. He had no previous experience flying Rey but is a seasoned A-Wing pilot.

Both our lists are 98 points (which is bad for me). My list is 98 points because I have hated facing PS10 Rey on Vassal and wanted the initiative so I could strip her Focus token with Hot Shot before she fires. My initiative bid was not enough, we rolled, Joel won the roll off. This was a bad start!

Joel gave me initiative. I jumped for joy inside!

Jake looked like he was coming in fast but then broke off and flanked. The problem Joel faced here was that RAC was never going to allow Jake to keep his focus long enough to fire his Prockets. I managed to take Jake off the board in the first few turns of combat without taking too much damage myself and then it was just a slug fest to get Rey off the board. I lost half points on the Deci and it was all over

Win 100-32


Match 2 vs Federicco Ciccotti


Poe – Sensor Cluster / PTL / Black One / Autothrusters / R2-D2

Rey – s-loop title / Kanan / Finn / VI


Another PS10 Rey list, this time, at 100 points. I took initiative and began the onslaught. We set up to joust and I did a 5 forward with Marrek. To get out of taking a range one shot from Marrek, Poe had to boost on past my list giving him no shot that turn. I went all out on Rey and managed to make quite a dent in her health. For the next few turns, Poe was turning round so Marrek was on blocking Rey duties and RAC just stayed out of Rey’s arc and kept shooting until she was dead. By this time Poe had turned around. Unfortunately for Poe, VI RAC with Hot Shot is about as much of a hard counter as Poe can get. He did not last very long.

Win 100-0


Match 3 vs Terry Mitchell


Ryad – x/7 / Crackshot

Vessary – x/7

Galive – x/7 / Juke

That's not the best place to sit Marrek!


This is it! Final round and I’m 2-0. If I get this right I go undefeated! I wasn’t too worried about seeing triple Defenders, my list has about a 50/50 chance against triple Defenders.

The first engagement did not go too well for Marrek, 3 Defenders lined up in front of him. I barrel rolled to get out of the front one’s arc… and it wasn’t enough, he was still in. It wasn’t as bad as it could have been though, he lost his shields but was still alive.

After this, Marrek refused to die. A combination of RAC deleting focus tokens and Marrek juking through evade dice resulted in a turn where Marrek killed the Glaive and then Vessary killed Marrek.

Now it was my full health Deci vs Ryad (who has spent her Crackshot) and Vessary. We had a quick chat about points, I was currently up by one point! From then on I knew that if I killed either one of his Defenders and he got half points on my Deci, we would be tied and it would go down to a final salvo!

For some reason, I didn’t focus fire. I ended up at time with half points on the Deci and having done 4 damage on Vessary and 3 damage on Ryad. I really should have focus fired on either one of them, at least then there would have been an even chance for the final salvo.

Loss 34-67


So there we go, not a bad showing. Here are the rankings for the Sparklers

1st – FO (Go Sparkle Motion!)
3rd – Lloyd
5th – me
7th – Joel

Sparkle Motion Squadron; we came, we saw, we ranked in every available odd numbered place up to 9th. Boom!


Wednesday, 31 August 2016

Battle report - 29-08-16 - Warboar - Bromley - Defend Alderaan format

29-08-16 – Warboar – Bromley – Defend Alderaan


If nothing else, this tournament has solidified my love for this store. It’s so good! The staff are friendly, the shop is always well stocked, the events are well run (and run to time!!!) and the addition of different formats is always fun!

Speaking of which...


The Format

Initially, all we were told is that there would be some list limitations, these were as follows:

ALL FACTIONS:
- Up to 100pts cap per squad
- No more than 50pts to be spent on a single ship
- No more than 1 'Twin Laser Turrets' allowed in a list
- No more than 2 'Crackshot' Elite Pilot Talents in a list
IMPERIALS:
- No 'Palpatine' crew card allowed
SCUM:
- No more than 1 Jumpmaster 5000 in a list
REBELS:
- No 'R2-D2' astromech card allowed

So what does that mean? No Palp Aces, no triple Jumps, no Dengaroo, no Fat Han, no Rebel regen, no 4 TLT Ys and no crack swarms (TIE or A-Wing). In short, it means variety!

It turns out that the format was actually a bit more in depth than that, which we found out on the day! More about that later…


The List

Here’s the thing… I can’t wait for Fenn Rau to get here, I’m looking out to sea every morning just in case I catch a glimpse of that boat. One day... one day soon! Essentially, the effect of this is that I have been playing lots of games with my Fenn list on Vassal and have completely forgotten how to construct lists without him!
In the week leading up to this tourney I had been playing around with some hastily put together Scum stuff. Palob, Manaroo, Kavil slowly morphed into N’dru, Manaroo, Kavil which somehow, the night before the tourney, morphed into a double Ghost list! (not sure how that happened!)

Anyway, so this was the list:

Lothal Rebel A (50)
FCS / Autoblaster turret / Extra munitions / Plasma Torps / Ezra / Hera / Anti-Pursuit lasers

Lothal Rebel B (50)
FCS / Autoblaster turret / Extra munitions / Conner Net / Han / Sabine / Tactical Jammer

And the thinking behind it? Well, the basics are obvious aren’t they? 36 hit points, 8 attack dice and a 5 K-turn for good measure. 

Getting more in depth, we have Lothal Rebel A who shall henceforth be known as the Stressboat. She gets stressed then can modify an eye into a crit and has her whole dial open… it’s brilliant, especially when you have a target lock on someone from FCS. Just awesome! The addition of plasmas is because of that blind spot out of the back of the Ghost, the Plasmas cover that in this list at range 2-3 (if you have a lock on that ship, anyway) and Autoblaster covers range 1. That’s the idea anyway! Also, she is sporting Anti-pursuit lasers, which proc’d once or twice during the day.

Lothal Rebel B has Han, Sabine, Conner Net and Tactical Jammer on board. Han and FCS is also great, roll four dice and if you get more blanks, use the TL to reroll, if you get more eyes, use the TL with Hans ability to change them all to hits. Then get a new TL from FCS, rinse and repeat! Conner Net; I’ve never used bombs before, but I hear these things are quite good, especially with Sabine; 2 damage and 2 ions and no actions. I managed to get them off a few times too! Tactical Jammer? I had a point free soo….. yea, it never proc’d!

I should also say that the inspiration for the list came from a casual match I'd had with a Dark Sphere player, Lloyd Boman, a few weeks back. He played a slightly different variation of the double Ghost list, but it got me thinking. By pure coincidence, he turned up to this tournament as well!

So then, that’s the list. Onto the day!


As we set up for our first round, Jason, the TO for the day, talked us through the extra bits of the Defend Alderaan format. Essentially, the battles were taking place near the Death Star (which was in the process of powering up to destroy Alderaan) and so occasionally, the Death Star would fire at one of our tables and potentially one-shot one of our ships! Jason would chose a table at random then use a d6 to determine which ship was being shot at, then the owner of that ship would be given a number of green dice, (ranging from 5 in the first round to 1 in the last round) they would roll these dice and as long as they got at least one evade, the ship would remain in play, if not… BOOM!


Game 1

Vs Will Hasslewood

Countess Ryad – PTL / TIE/x7 / Twin Ion Engine Mk. II
Colonel Vessary – Juke / TIE/x7
Sigma Phantom – Intel Agent / Enhanced Scopes / Stygium Particle Accelerator

The first engagement of the day


So, as Will arrived at the table, I noticed two things; 1) he was wearing a 186th Squadron T-shirt and 2) he was running two Defenders. Both of these things filled me with ambivalence (two conflicting emotions about the same thing!) I have had some seriously good experiences with members of the 186; in my experience, they are always really friendly, good natured and full of helpful advice HOWEVER I have never beaten any of them. Defenders with /x7, they are great ships and quite fun to fly against HOWEVER that /x7 title is hard to break through.

So, (spoiler!) I lost this one but it was super close and there was one roll which could have made a huge difference. We’ll get onto that in a short while.

As we converged, I decided to concentrate all my firepower on the Defenders and leave the PS3 Phantom until then end, after all, it’s only PS3, what can a PS3 ship do. Oh... my mistake! A PS3 Phantom can do a hell of a lot, when it’s not blocking me (which it did a lot, by the way) it’s throwing four or five dice at me. Ouch!

Anyway, I ended up killing of Vessary without too much trouble, Autoblaster was my friend. Then  Ryad got herself into a lovely position to drop my Conner Net on top of but Will was one step ahead and super blocked me for a few turns so I couldn’t drop it, bad times. It was around this time where the fateful roll happened, Lothal Rebel A was stressed and had the uncloaked, un-tokened Phantom at range 2, I rolled 3 crits and an eye, with Ezra, I turned the eye to a crit. Four crits! Literally, a perfect result! Anything other than two evades would have been lovely but Will rolled well and there were those two evades. Shields down! Soon after this Rebel A died. I did manage to take down Ryad before that pesky Phantom brought down my second Ghost.

This was a really good game and required some serious thinking on both sides. Will also did not tarnish the 186th rep, a great player and a very friendly chap. I’ll go after the Phantom first next time!

Loss 71-100


Game 2

Vs Andy Harris

Chewbacca – Predator / C-3PO / Evade title
Green Squadron Pilot – PTL / Prockets / Chips

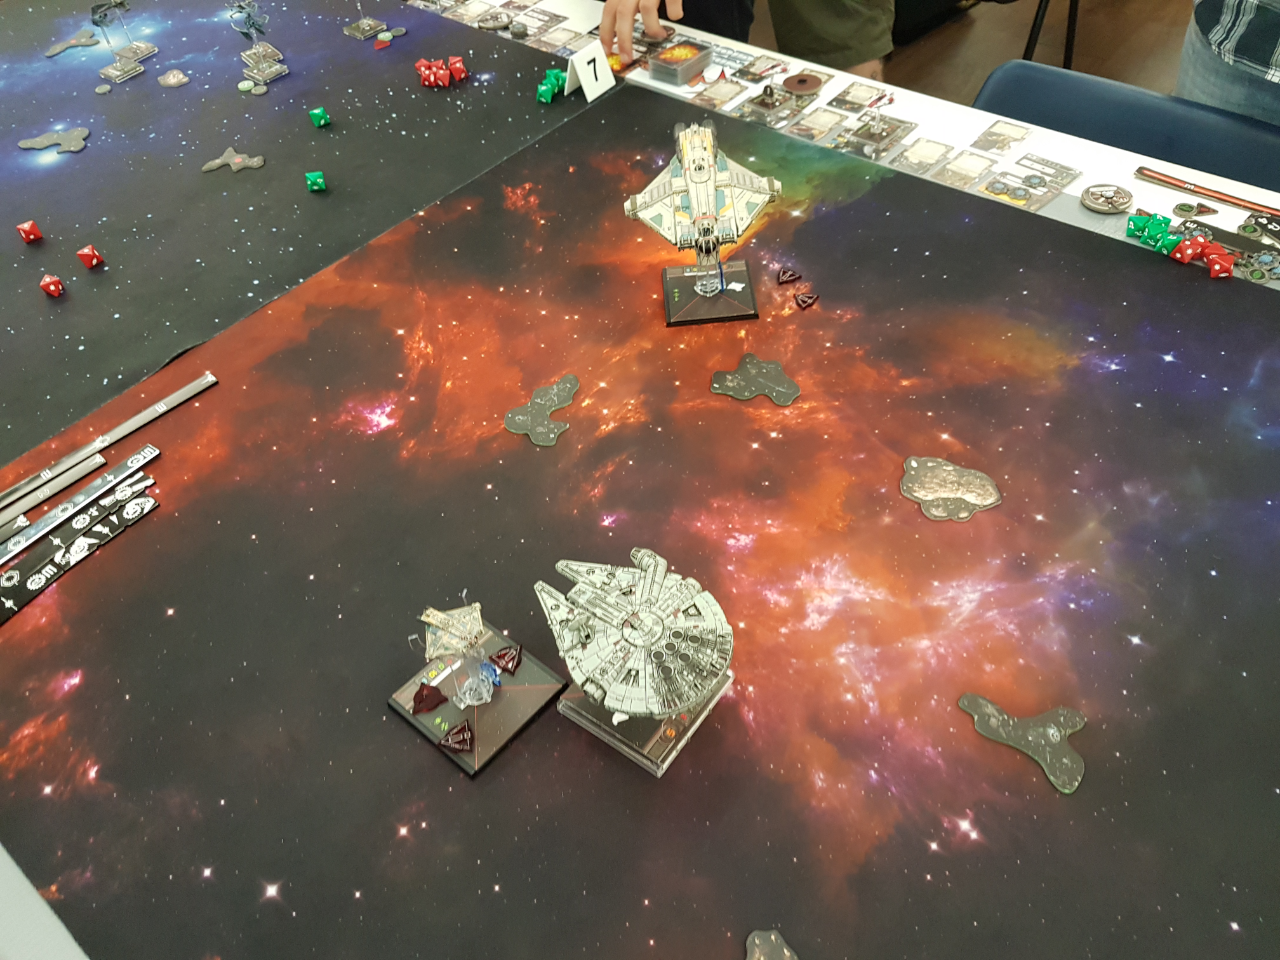
All hail the Mini Ghost that Lloyd Boman lent me to help with my size issues!


Andy is a new player!! He had played a few games before coming and had even brought his 10 year old son along (I think I overheard him saying he had been playing for about a year)

I’ve played Chewie a fair bit before and as much as I love that ship, it’s strength lies in being defensive, rather than offensive (although Predator does help that a bit) so I decided to leave him alone for a bit whilst I dealt with what I believed to be the bigger threat, Procket A-wings! If those things got into range one, they would seriously hurt! I managed to set up a joust and took both A-wings out before they got their Prockets off. Thank goodness for that.
I have to say that I pulled some great moves in this game, I was trying to have a nice casual game but I just kept ending up exactly where I needed to be. Often by accident.
For example, I managed to Conner Net Chewie, this then resulted in him landing on a rock the next turn, I then moved my other Rebel in and blocked him so he ended up staying on the rock! If only I could play like this on purpose!
Anyway, Chewie did manage to take on Rebel B but then died a turn later.

Win 100-50


Game 3

Vs Henry Westcott

Wes – VI / R3-A2 / Integrated Astromech
Poe – BB8 / PTL / Autothrusters
Sabine – PTL / Autoblaster / Kanan

This is actually all the ships in this game in one photo,
most of Henry's list, however, is obscured by my massive Ghosts!


Henry was the third opponent in a row who was friendly and welcoming. I am having a very good day :)

Henry’s list needed serious brainpower to fly due to all the repositioning, order of movement and intricacies of the list. For example, you have to perform Sabine’s pilot ability before you revel the dial, whereas Poe with BB8 works after you reveal your dial, even though both repositioning actions happen before you perform the maneuver. It makes sense because you have to reveal a green maneuver to proc BB8 but it’s the sort of thing that after a few games, is easy to forget!

So, we ended up Jousting and in the first round of shooting, I got all of Poe’s shields down. Good start! Next turn, Wes ended up at range 1 of Rebel B and range 2 of Rebel A. Wes lost his shields that time. I then 2 turned Rebel B to drop a Conner Net on Wes (poor Wes) who ended up at range 1 of Rebel A and got Autoblastered to hell. Soon after, I got a lucky 5 dice Target Locked shot on Poe who died. Then it was Sabine vs two Rebels, she quickly dealt the last few damage to Rebel B. Sabine and Rebel A had a bit of a tussle BUT THEN THE DEATH STAR TARGETED OUR TABLE!

Jason rolled a dice to see whether it was Sabine or the Rebel being targeted, it was Sabine… Henry rolled an evade! I’m glad. It would have been a hollow victory if Sabine had died like that. However, she did land herself on debris the next turn and roll a crit to take her last hull off.

Win 100-50


Game 4

Vs James Dowdall

Miranda – TLT
Lothal Rebel – Autoblaster / FCS / Chopper
Biggs – R4-D6 / Integrated Astromech

*** Interulde one ***

Jason – The Death Star is totally unopposed and WILL destroy Alderaan at the end of this game. Only one thing can stop it! There are two Rebel players in the top 8. James and Tom, if EITHER of you are willing to sacrifice one of your ships you will be able to do a trench run at the end of this game and have a 50% chance of one-shotting the Death Star. Are either of you willing to do this?

Tom - …

James - … Biggs will do it!

*** End of Interlude one ***

So, this looked quite good for me, my 100 point list against James’ 74 point list (pretty good initiative bid though). As I was thinking that, Jason brought a ship over to our table… Biggs was being replaced… by Shara Bey in her Arc-170!

I remembered reading on facebook that someone had brought back an Arc from Gen Con and had donated it to Jason but seeing it in the “flesh” for the first time, it was pretty special. So now James’ list looked like this.

Miranda – TLT
Lothal Rebel – Autoblaster / FCS / Chopper
Shara – Alliance Overhaul

Screw Epic play, three Ghosts in close quarters, that's just awesome!


James' list was now actually 102 points (which was definitely why he beat me. Spoilers!) So we set up and came towards each other, my plan was to go all guns on the Lothal Rebel and as much as possible, avoid the others until it was dead. I realise now that I set up wrong, with Rebel A on the outside and B on the inside, when I banked into the middle of the board, I ended up stressing Rebel B and keeping Rebel A unstressed. No actions on B and no Ezra modification on A. Badness. I did actually manage to Conner Net Shara before A died though (although I had no shots on her post ion maneuver so it was slightly pointless but still).

Then something happened.


*** Interlude two ***

Jason - The Death Star is targeting table 7 (Myself and James were on table 5)

After a roll on the d6, it is decided that the Mist Hunter is being targeted. The Owner of the Mist Hunter fails to roll any evades.

Everyone in the room – Ohhhhhhhhhhhhhh nooooooooooooo!!!

The Mist Hunter is taken off the board, Jason then presents the owner of the Mist Hunter with the ‘booby prise’, a brand new, sealed Tantive IV

Everyone in the room - *claps*

James – Right. Where were we?

Me – Erm… not sure...

*** End of Interlude two ***


Really now, come on! How often have you seen £60 worth of prize support at any of these type of events? I’m talking even for the winners. Especially with the entry fee only being £5! Warboar, you have out done yourselves!

Anyhoo, back to the game! (for a few minutes, anyway)

Shortly after this, Rebel B died, then James’ Ghost died, the Shara bit the dust.


*** Interlude three ***

Jason – It’s time for Biggs to do his trench run! He is currently unopposed and all James has to do to destroy the Death Star is roll a hit or crit on a single red dice HOWEVER if any Imperial players want to sacrifice a ship from their game to intercept Biggs, now is your chance.

Someone from table 3 raises their hand, removes Countess Ryad from the board and shakes his opponent’s hand. He has just thrown the game… what a guy!

Biggs and Ryad set up to destroy/defend the Death Star, James and the owner of Ryad must each roll one die; if Ryad rolls a hit, she destroys Biggs but if Biggs rolls a hit, he destroys the Death Star. If both ships get the same result, the will continue to roll until one comes out on top.

Ryad rolls, it’s an eye.

Biggs rolls, it’s a hit.

The Death Star is vanquished and Jason starts playing the music from the end of Episode VI.

James – Right. Where were we?

Me – Erm… not sure…

*** End of Interlude three ***


One Damaged Rebel vs a full health TLT Miranda… I got a few shields off her but realistically, I was never going to win that one. Still, it was actually a really good game!

True to 186th form, James was, once again, a really friendly and fantastic opponent and (for avid readers of the blog) I think I had a better showing this time than the last time we played. (please see the Warboar regionals post here where James did bad things to my Chewie!)

What I have realised is that I need a plan for dealing with Miranda, I’m not sure I’ve ever actually won a game against her. That’s one for the think tank.

So I ended up placing 11th of 29 players. Again, mid table but I’d say top of the mid table (clawing my way up the ranks!)

What did I learn? Well, I like the list, I’m not sure how it would do against the more "meta" lists but I enjoyed playing it anyway. I think the torps on Rebel A were a mistake though. I actually put them on there because I knew I wouldn’t have any actions with which to drop bombs. (otherwise I would have put Prox Mines on there) I had dismissed reveal bombs because of my PS but I think they would still have been more useful that the torps (seeing as I didn’t actually get any of them off the whole day!)

A few special mentions go out to Lloyd Boman for allowing me the use of the Mini Ghost for when mine were too close to each other (have a look at the picture from my second game to see what I mean) and Jason Grimwood from Warboar for organising and TO-ing such a great event. I believe Ben Lee from the 186th had a fair bit to do with the organisation of the day as well. Thanks to everyone!


Redd XIII signing off for another day. Laters!

Tuesday, 5 July 2016

Let's Compare Decks! - A discussion on the two different damage decks for the X-Wing Miniatures game

Question: when was the last time you saw someone using the original core set damage deck? I’d hazard a guess that it was just before the new core set came out, right?

Why? Because newer is better? Because of the large amount of people that claim it’s better?

Because you’ve sat down with both damage decks and critically gone through them with reference to your list and worked out that the new deck is better? Nah, me neither… until very recently.


My new list

I’ve gone Defender mad and I’m about to run this list:

2 x Deltas – TIE/x7 / Stealth Device
Vessary – TIE/x7 / Stealth Device / Juke

I’d heard someone say something about the old damage deck being better for generic pilots so I thought I’d have a look… now I’m going to have to dig it out and see if I still actually own all the cards!


Both full decks side by side

Note: from now on, I’ll refer to the deck that you get in the original core set as the “old deck” and the deck that comes in the TFA core set as the “new deck”

The first thing to look at when comparing new and old decks is the cards that have no change to them like Direct Hit! and the cards that only have slight changes in the wording of the cards, for example, Thurst Control Fire which has had a one word alteration to clarify some timing issues.

Old deck - Direct Hit!: (Ship) This card counts as 2 damage against your hull.
New deck - Direct Hit!: (Ship) This card counts as 2 damage against your hull.

Old deck - Thrust Control Fire: (Ship) Immediately receive 1 stress token. Then flip this card facedown.
New deck - Thrust Control Fire: (Ship) Receive 1 stress token. Then flip this card facedown.

As the slight change is only going to affect anything in a very small amount of cases, for the purpose of this, article, I will count them as being the same thing.

So then, these cards have stayed the same:

Console Fire

Damaged Engine

Direct Hit!

Thrust Control Fire

Damaged Cockpit

Stunned Pilot


So 6 out of the full 14 different cards in the deck are (near enough) exactly the same. This is a good start.


Clearing the crits with dice

There seems to be a trend in the new damage deck for making crits easier to cancel.
Damaged Sensor Array and Structural Damage can both be cancelled by rolling an attack dice, if you roll a hit, the crits are cancelled. The difference comes when that dice roll comes up as a crit. If you are playing with the old deck, the crit stays, if you are playing with the new deck, flip that crit down!

Essentially that means if you are playing with the new deck, you have a 50% chance of clearing the crit, however if you are playing with the old deck, you only have a 37.5% chance of clearing the crit.

This is just a fact of the decks and doesn’t really come down to what list you are playing.

Score one for the new deck!

Damaged Sensor Array

Structural Damage


Minors into Majors (shit got real!)

Two cards have been “upgraded” from minor effects in the old deck to major effects in the new deck. These are Minor Explosion and Minor Hull Breach (in the old deck) which changed to Major Explosion and Major Hull Breach (in the new deck). Let’s have a look at the difference.

Minor Explosion / Major Explosion


Straight up, this is a score for the old deck, obviously you would prefer to take a normal damage, over another crit, right?
Pretty much, but if you are playing certain lists, this makes no difference at all. A-wings, Z95s, Attack Shuttles, M3-As, TIE Adv. Prototypes, Phantoms and E-wings have 2 hull so if you take a crit and it comes up Minor/Major Explosion, it doesn’t matter if the subsequent damage is a hit or a crit, you roll a red dice and if it comes up a hit, dat ship go boom! This is an important consideration if you are playing a list where ALL your ships only have two hull, for example a Z swarm or an A-wing swarm.

Minor Hull Breach / Major Hull Breach


Well… these are different, maybe they deserved a more different name? Who knows, anyway, you can’t really compare them. This really IS list dependent.
If you are running an A-wing swarm, you really don’t care about Major Hull Breach because the next hit you get is going to kill you anyway, whether it’s a crit or not HOWEVER these swarm type lists tend to K-turn a lot so you don’t really want Minor Hull Breach.
If you are running Defenders, you can pretty much go whole games without ever doing a red maneuver (love those white K-turns) so Minor Hull Breach is a “good” crit for this ship BUT if you’ve still got three hull left, get Major Hull Breach then the next damage turns out to be a Direct Hit! that is bad times.

Two different lists, two different preferences.


Cards that have been replaced

Some cards from the old deck have been completely replaced by new, different cards in the new deck.

Munitions Failure is replaced by Loose Stabilizer
Injured Pilot is replaced by Shaken Pilot

Well, you can kind of see the reason for these. Imagine PTL Soontir getting Injured Pilot! No more PTL AND no more stress/focus shenanigans… that’s a well dead Soontir.
Now imagine a Delta Defender getting Injured Pilot… no change whatsoever.

So it’s a balance thing, the new damage deck was brought in to level the playing field, in that previous example, using the new deck instead would have got both ships a Shaken Pilot crit, more rough for the Defender and less rough for Soontir.

You could extrapolate similar findings with the Munitions Failure / Loose Stabilizer crit if you looked at a HWK with TLT and a base X-wing. With Munitions Failure, your HWK would be totally useless for the rest of the game but the X-wing would be unchanged, whereas with Loose stabilizer, both ships are equally inconvenienced.

I think it’s worth stating that this part of the new deck benefits the game, as a whole, massively. (who wants to win against a nerfed Soontir, anyway!) BUT it doesn’t mean that if you are working on a list by list basis, the new deck is unquestionably better. Do some thinking!


Other honorable mentions

So there are two other crits which deserve a mention.

Blinded Pilot

Blinded pilot went through a change, whereby in the old deck, you had to wait for the opportunity to attack another ship (ie. have another ship in range and in arc and then declare that ship as the target of your blinded attack) before the crit would clear. In the new deck, the player just has to wait for the next time it would be that ship’s turn to attack, then the crit clears.

The old deck is fine if you are a turret but what if you are an arc dodger, you effectively have to come around for another pass JUST to clear the crit. Bad times!


Weapon Malfunction and Weapons Failure

This change was due to ships carrying cannons or turrets not being affected by Weapons Malfunction as it only nerfs your PRIMARY weapon value. (Dash’s favourite crit). Weapons failure effects all ships equally.

So, if you have a squad that uses just secondary weapon turrets, you would chose the old deck, right? Nope, because what happens if you get the Munitions Failure crit? One of your scary 3 dice TLT Y-wings becomes a 2 dice ship that only gets to fire once AND has to have his target in arc! MEGA NERF!


That was interesting... Now stop rambling and tell me which deck to use!

So that’s all the crits discussed, let’s look at a few lists and see what which would be the best for that list.

I have analyzed the effectiveness of each damage deck over three lists. I’ve tried to use lists that I have a fair amount of experience playing with or playing against. To that end, I’ll look at my old Imperial list with Vader, Omega Leader and Redline, my new Defender list with Vessary and two Deltas and finally the 5 A-wing crack swarm that Joel has been playing for a while (and consequently, I have played against a lot!)

As some things will benefit or handicap a list more than other, I have tried to set up a scoring system ranging from -3 (Soontir getting an Injured Pilot crit. ie. useless Soontir) to +3 (Delta Defender getting an Injured Pilot crit. ie. no change whatsoever) It’s obviously VERY subjective so only here as a general guideline and to help you make your own decisions.

Also, I’m going to completely disregard Console Fire, Damaged Engine, Direct Hit!, Thrust Control Fire, Damaged Cockpit and Stunned Pilot as they are exactly the same in the old and new decks (as stated before).


A-wing crack swarm

Joel's A-wing crack swarm


5 x Green Squadron Pilot – A-wing test pilot / Chardan / Adaptibility / Autothrusters / Crackshot

So let’s go down the list.

Damaged Sensor Array and Structural Damage – the new deck wins on both of these because of it’s slightly easier method of clearing these crits. As there is only a 12.5% difference I’ve only awarded the new deck +1 for each crit and the old deck -1 for each.

Old deck: - 2 points
New deck: + 2 points

Minor/Major Explosion – it matters not! Having only 2 hit points means that whether that next incoming damage is a hit or a crit, that ship = dead! No points for either deck here then.

Old deck: - 2 points
New deck: + 2 points

Minor/Major Hull Breach – Major Hull Breach is negated (once again) by the 2 hull points. Who cares if the next hit is a crit or not when it will kill you regardless. I shall award the new deck + 3 for that!
Minor Hull Breach however, will inconvenience this list a fair bit. The swarm likes to K-turn a fair bit in my experience and having to roll an attack dice every time you do that and possibly blow the ship up is not so good! Therefore, I will award the old deck a – 2

Old deck: - 4 points
New deck: + 5 points

Munitions Failure and Loose Stabilizer – Munitions failure is a dream crit for these A-wings. They have nothing to discard. + 3 for the old deck there!
Loose Stabilizer is a bit of an arse for the A-wings though, they really rely on their agility to get out of tight situations. - 2 for the new deck.

Old deck: - 1 point
New deck: + 3 points

Weapon Malfunction and Weapons Failure – No difference here as the A-wings only use their primary weapons. No points!

Old deck: - 1 point
New deck: + 3 points

Blinded Pilot – the new deck is always going to get my vote on this, often it doesn’t make too much difference though, especially to a swarm so I give the old deck – 1 and the new deck + 1.

Old deck: - 2 points
New deck: + 4 points

Injured Pilot and Shaken Pilot – Injured Pilot will pretty much do nothing to the A-Wings as they don’t have an in-built pilot ability, Adaptibility is set at the beginning of the game and they will almost always have spent their Crackshot by the time they get down to hull. + 2 points (not the full + 3 in case they haven’t spent Crackshot)
Shaken Pilot could cause a bit of an annoyance, depending on the situation. Not being able to do a straight maneuver for the one turn where you expect to get a block can be frustrating. - 1

Old deck: 0 points
New deck: 3 points

So the new deck comes out on top for this list. Let’s see about those Defenders!


Defenders of The Universe

Be afraid! Here come the Defenders of the Universe!


Vessary – TIE/x7 / Stealth Device / Juke
2 x Delta Squadron Pilots – TIE/x7 / Stealth Device

Damaged Sensor Array and Structural Damage – same as with all lists, the new deck wins this (but not by much).

Old deck: - 2 points
New deck: + 2 points

Minor/Major Explosion – Well, getting a Major Explosion, then rolling a hit and pulling a Direct Hit! is the worst thing in the world on a three hull ship (well, maybe not, but still…) The old deck definitely wins this one! Old deck + 2, new deck – 2.

Old deck: 0 points
New deck: 0 points

Minor/Major Hull Breach – Any mechanic that will net you extra crits (such as Major Hull Breach) is bad. Not the worst thing because the Defenders only have 3 hull so as long as you don’t get this crit on the very first point of hull damage, it isn’t worth anything. Not terrible but could be bad! - 1 for the new deck.
The maneuvers I tend to use on my /x7 Defenders are straights (all greens), 3 turns and banks (all whites) and that lovely, white 4 K-turn. Losing the ability to safely do any red maneuvers because of Minor Hull Breach… not much of a bother at all! + 2 to the old deck!

Old deck: + 2
New deck: - 1

Munitions Failure and Loose Stabilizer – Munitions Failure, I wish all (my) crits were like this! Nothing to discard so no change here. The full + 3 points for the old deck!
Loose Stabilizer? I spent 3 extra points getting my agility to 4 and now it’s gone all the way down to 2??? Not what I’d want. - 2 for the new deck.

Old deck: + 5
New deck: - 3

Weapon Malfunction and Weapons Failure – And again, no difference here, us modern Defenders don’t use any secondary weapons! Nil points for either side!

Old deck: + 5
New deck: -3

Blinded Pilot –bad times for the old deck here. Not being able to clear this crit by running away, then coming back again would be very annoying! Old deck – 1, new deck + 1.

Old deck: + 4
New deck: - 2

Injured Pilot and Shaken Pilot – Well, this is actually a pretty difficult one. Injured Pilot won’t have any effect on my Deltas but on Vessary it will strip his ability AND Juke. Bad times. That said, it does only have the potential to affect a third of my list. Old deck gets a – 1.
Shaken pilot is also awkward to analyse for this list. I don’t often do straight maneuvers when in the thick of a dogfight (it’s worth mentioning that the 4-K is NOT treated as a straight) I’m usually either turning or K-ing. It could still be annoying though. I think the new deck gets a – 1 for this as well.

Old deck: + 3
New deck: - 3

So by a rather large margin of 6 points the old deck wins!


Lots ‘O’ Locks

Lots 'O' Locks


The previous two have been fairly easy to analyse because they comprise the same ships. This one is going to be awkward but let’s see how we go...

Vader – VI / Engine / Title / ATC
Omega Leader – Juke / Comms Relay
Redline – Plasmas / Clusters / FCS / Guidance Chips / Extra Munitions


Damaged Sensor Array and Structural Damage – same as with all lists, the new deck wins this again.

Old deck: - 2 points
New deck: + 2 points

Minor/Major Explosion – And again, getting a Major Explosion, then rolling a hit and pulling a Direct Hit! = bad! The old deck definitely wins this one! Old deck + 2, new deck – 2.

Old deck: 0 points
New deck: 0 points

Minor/Major Hull Breach – As with the last list, more crits is bad, but Vader and Omega Leader only having three hull each makes this not so bad. Redline, however, could end up with 6 crits from the new deck!!! Fairly bad, - 2 for the new deck.
Minor Hull Breach however, will also have a fair bit of an impact on all the ships in this list. I K-turn with all these ships, Redline included! Who needs actions when you’ve got target locks AND guidance chips? More badness – 2 for the old deck.

Old deck: - 2 points
New deck: - 2 points

Munitions Failure and Loose Stabilizer – Munitions Failure on Redline is a bit rubbish as you have to discard a missile or torp BUT it’s not as bad as something like Dash losing his HLC. It doesn’t have any effect on Vader or Omega Leader, so that’s good. - 1 for the old deck.
Loose Stabilizer is a bit more of a kicker for any of these ships, Omega and Vader because they rely on those greens to keep them alive and going down to no green dice on Redline just feels wrong! - 2 for the new deck.

Old deck: - 3 points
New deck: - 4 points

Weapon Malfunction and Weapons Failure – Well, the only difference is that if you are using the old deck and Redline gets this crit, his torp and missile shots aren’t nerfed. Not much change, I know but it still edges the old damage deck in front for this one. - 2 for the old and – 3 for the new.

Old deck: - 5 points
New deck: - 7 points

Blinded Pilot – Bad times for the old deck here. These ships are arc dodgers (well, two of them, anyway) and won’t have shots every turn. This makes the old damage deck worse for this list than most. Old deck – 2, new deck + 1.

Old deck: - 7 points
New deck: - 6 points

Injured Pilot and Shaken Pilot – Injured Pilot is awful for this list! Redline’s tactics hinge on getting 2 target locks, Vader is great with his 2 actions and Omega Leader without Juke and her ability is just a high PS TIE F/O. Very bad times! - 3 for the old deck!
Shaken pilot could be bad but then again, it’s only one turn and then it gets flipped. Not great but not terrible. - 1 for the new deck.

Old deck: - 10
New deck: - 7

The new deck, once again comes out on top here but the way my scoring has turned out, it really shows how much crits in general hurt named pilots more than generics.


So those are my findings, they are obviously subjective but the point I’m trying to get across is that you should try and do a bit of critical analysis on which deck is best for your list.

I’m going to dig out my old deck and give it a try on my Defenders of the Universe list!


Redd XIII signing off.